How to make perches for chickens with your own hands, options and sizes
The roost for keeping chickens provides convenience, allows the birds to rest and gain strength for the new day. Several options have been developed for the chicken saddle. Depending on the number of individuals, the area of the chicken coop, the breeder chooses a specific design. Each of them has its own pros and cons.
Why do hens need a roost and nest for laying hens?
Roosts and nests are created in artificial chicken coops, so that the birds have a place to rest and incubate eggs. The long-standing relatives of chickens used to equip themselves with places to rest.
Placing chickens on the floor contributes to the development of infectious and fungal diseases. Viruses and fungi thrive in dirty floor litters.
For the design of the saddle, it is necessary to correctly calculate the distance between the tiers, where the required number of sockets are placed.
In the cold season, birds nestle against each other, thereby providing additional heat to each other. And in summer, on the contrary, chickens move away from each other to keep it cooler.
This is also taken into account when placing in perches at different times of the year.
Roost options
There are several design options. Each breeder chooses a perch suitable for his coop, taking into account the size of the coop, the breed of birds, and the features of the content.

One tier
The simplest design. It can be completed in 1-1.5 hours. Suitable for small chickens indoors. The bar is fixed along the wall with wooden fasteners that are attached to the wall. Does not require the installation of a waste tray.
Multi-tiered
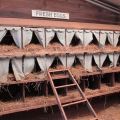
The poles are arranged in the form of a ladder. This is done so that the chickens do not get each other dirty, leaving droppings. Also, this placement has one plus. In such a chicken coop, a clear hierarchy is formed. Strong, healthy individuals are located on the upper tiers, and sick and weak ones on the lower tiers.
Angular
For the corner option, both single-tier and multi-tier perches are suitable. The poles are fastened between the touching corners. You can equip all four corners in the room. There is a minus, a multi-tiered option, will contribute to the pollution of the chicken coop. Therefore, one pole is installed permanently, and the rest are made removable.
Portable
Outwardly it is a table. A tray is installed on the countertop to remove the droppings. Poles are attached to the table. The table must be sized to fit the doorway so that it can be moved.Wheels are screwed onto the table legs, this makes it easier to move the perch.

Important! In the manufacture of a portable perch, the pallet is supplied with sides, and the surface is polished with a grinder.
Over the nests
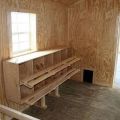
Install the structure against the wall opposite the door. Prepare several plywood boxes for nests. Above them, a bar is attached 30 cm higher.This helps to save space. A tin tray is installed on the roof to collect droppings and keep the chicken coop clean.
How to make a perch with your own hands
Making a perch with your own hands is not difficult. It does not take much time and does not require the development of special skills. Every breeder should know how to make a DIY chicken saddle.
Tools and materials required
For manufacturing you need:
- wooden blocks;
- sandpaper;
- saw on wood;
- a hammer;
- nails;
- plane.
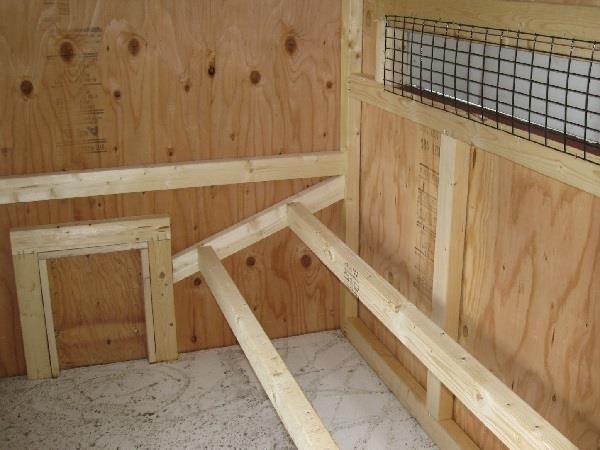
Drawing
After preparing the material, they begin to create a drawing. Prepare it following the instructions:
- Measure the size and area of the chicken coop. Take into account the location of the doors, windows of the feeders.
- Choose a suitable location for the roost.
- Bars for crossbeams are processed and made smooth.
- Saw bars of the required size.
- Mounts for the bars are installed on the walls.
- The poles are attached to the supports.
- Manure pallets for manure.
- A ladder is installed next to the poles to make it easier for chickens to go up and down.
Location
The place for the roost is chosen the most distant from doors and windows. It should be well shaded, be in constant warmth. In the cold season, chickens should not freeze. When installing, the number of individuals is taken into account, in winter they sit tightly next to each other, in summer, on the contrary, they move away from each other.

Important! In small rooms, multi-tiered structures are most often used.
Manufacturing and installation of a perch
The roost is made according to the scheme. The necessary material is prepared in advance. For each chicken coop, they prepare their own individual project plan. Manufacturing takes place in several stages:
- The prepared bars are sanded with a grinder so that there are no sawdust sticking out.
- Then they are checked for bendability.
- The mount for the poles is screwed into the wall.
- Install the planks and attach so that they do not scroll.
- Then a wooden staircase is installed in the corner, so that it is more convenient for the kupas to move.
Installation takes place using attachments to the wall. Then the support beams are installed. During installation, nails and screws of different sizes are used. Wood material is selected with a high density so that it does not sag when chickens roost.

Removable litter trays
Bird resting places are equipped with removable pallets. This helps to remove droppings on time and maintain hygiene in the chicken coop. They use mainly moisture-resistant material; galvanized sheet is suitable for perches.
Optimum pallet size:
- width 50 - 60 cm;
- length for the first floor - 60 - 70 cm;
- multi-tiered perch - 60 - 120 cm.
After installation, sawdust is poured onto the pallet, they absorb chicken droppings and eliminate unpleasant odors. A side up to 8 cm high is formed on the structure so that the contents do not spread. The back wall of the pallet is set at an angle to make it easier to remove waste. For multi-tier placement, the pallet is tightly attached to each tier.
